Create Vendor Account Groups in SAP
The following SAP Tutorial guides you on how to create vendor account groups in SAP FI.
Let configure the following vendor account groups in the SAP system
| Group | Name |
| A001 | Domestic Vendors |
| A002 | Import Vendors |
| A003 | One Time Vendors |
Steps to create vendor account groups:-
Refer below step by step procedure to create vendor account groups in the SAP system.
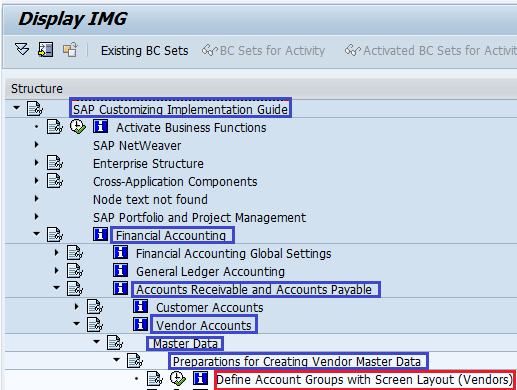
- IMG Menu Path:- IMG > Financial accounting –> Accounts Receivable and Accounts Payable –> Vendor Accounts –>Master data –> preparation for creating vendor master data –> Define Account Groups with Screen Layout (Vendors)
- Transaction code:– OBD3
Step 1:- Enter Transaction code SPRO in the SAP command field and press enter
Step 2:- Select SAP Reference IMG
Step 3:– Follow IMG Menu Path and select Define Account Groups with Screen Layout(Vendor)
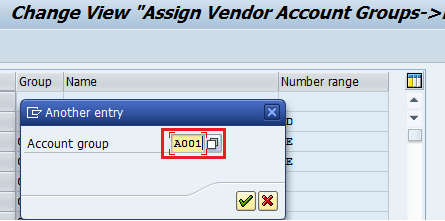
Step 4:- Select New entries to create a new vendor account group
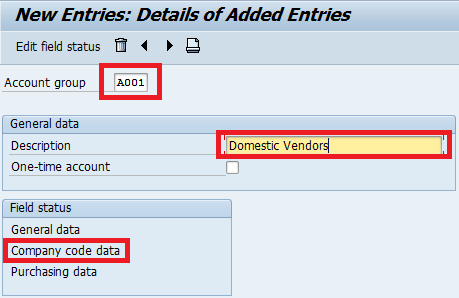
Step 5:– Update the following data
- Account Group:- Enter four digits Vendor Account group code
- Description:– Enter the name of the Vendor account group.
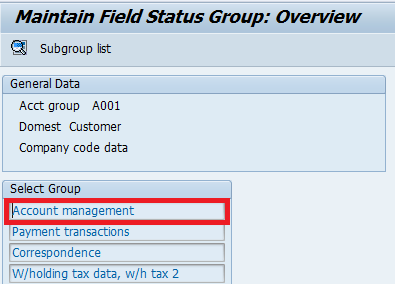
Select Company code data under field status and select Account management under a group,
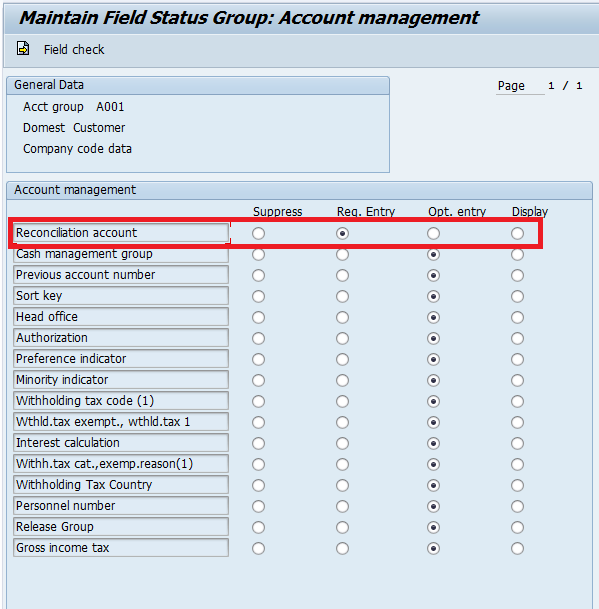
Select Reconciliation account as required entry
Step 6:- Select Save Icon to save the configured settings
Similarly create Vendor account groups for A002, A003 in SAP
Create Number Ranges for Vendor Accounts in SAP
After the creation of vendor account groups, the next is maintaining number range intervals for vendor accounts in SAP. The Vendor account number range intervals can be maintained with an internal assignment or external assignment.
- Internal assignment enables the system to generate the vendor account automatically during the creation of vendor accounts in SAP
- External assignment enables the user to assign the vendor account number during the creation of accounts.
You can Create Number Ranges for Vendor Accounts by using the following navigation method:
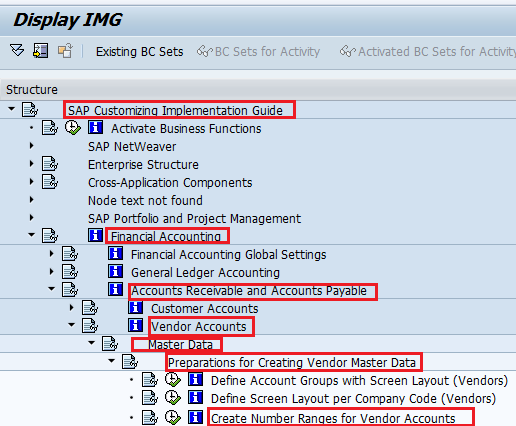
- IMG Menu Path:- IMG > Financial accounting –> Accounts Receivable and Accounts Payable –> Vendor Accounts –> Master data –> Preparation for creating vendor master data –> Create number ranges for a vendor account
- Transaction Code:- XKN1
Step 1:- Enter TCode SPRO in the command field and press enter
Step 2:– Select SAP Reference IMG
Step 3:– Follow the IMG Menu path to Create Number Ranges for Vendor Account
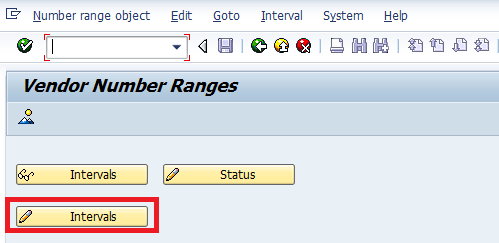
Step 4:- Select Change interval for creating number ranges for Vendor accounts
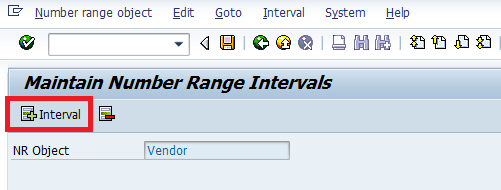
Step 5:- Select “Insert Interval”
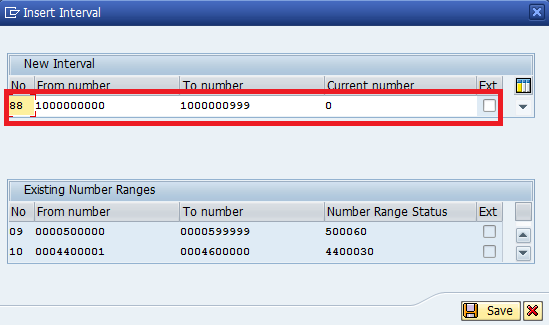
Step 6:- Update the following information and Enter
1. NO:- Enter NO that you want to identify the vendor accounts number range
2. From Number:- Enter from number of vendor number range
3. To number:- Enter to number of vendor number range
4 .Ext:- Select EXT box if you want External numbering
Step 7:- Select Save and ignore the warning message.
![]() Press enter to continue and save the configured vendor number range intervals in the SAP
Press enter to continue and save the configured vendor number range intervals in the SAP
Assign Number Ranges to Vendor Account Groups in SAP
After defining vendor account groups and number range intervals for vendor accounts in SAP, the next configuration step is the assignment of number ranges to vendor account groups in the SAP system.
It is a mandatory configuration step when you are creating the customer accounts as per account groups, and the system generates a number for vendor account as per this number range intervals.
You Assign Number Ranges to Vendor Account Groups in SAP by using the following navigation method.
- IMG Menu path :- Implementation Guide for R/3 Customizing (IMG) -> Financial Accounting -> Accounts Receivable and Accounts Payable -> Vendor Accounts -> Master Data -> Assign Number Ranges to Vendor Account Groups
- Transaction Code:– XKN1
In this activity, we will assign “88” number ranges to the “AD01” vendor account group in SAP.
Configuration Steps
Step 1:- Enter transaction Code SPRO in the SAP command field and press enter.
Step 2:- Select SAP Reference IMG
Step 3:– Follow the IMG menu path
Step 4:– Select Position
Now update the vendor account group that you want to assign number ranges and press enter.
Step 5:– Update Number range key in the number range field
Step 6:– Click on the save icon to save the configured setting
Thus Number range intervals are successfully assigned to vendor account groups in the SAP system.
Create Sundry Creditors in SAP
The following SAP Tutorial guides you on how to Create Sundry Creditors GL Account in SAP step by step. You can sundry creditors through the creation of a General ledger account and assign the vendor to a reconciliation account for the account type.
- Menu Path:- IMG –> Financial accounting –> G/L Accounting –> GL Accounts –> Master Data–> Preparations –> GL Account Creation and Processing –> Edit G/L Account
- Transaction Code:- FS00
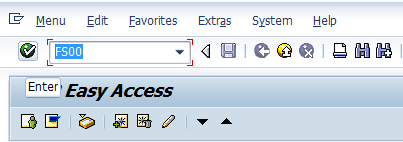
Step 1:- Enter Transaction Code FS00 in the SAP command field and press enter
Step 2:- In the Edit G/L Account Centrally screen, Update the following details
1. Enter G/L Account
2. Update Company Code
3. Click on Create Icon
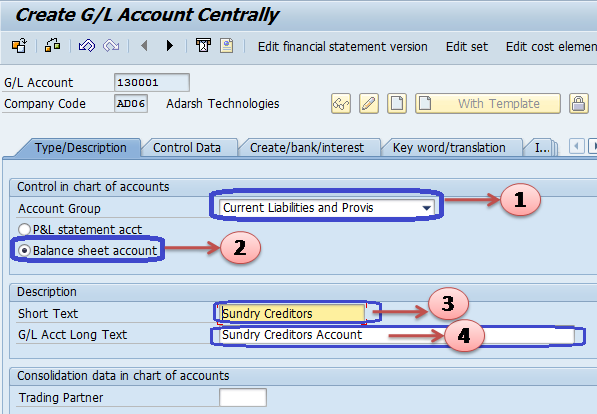
Step 3:- In the Next screen, update the following data
1. Account Group:- Update Account Group of GL Account
2. Select P&L Statement account or Balance sheet account
3. Short text:- Enter the short text of G/L
4. G/L long text:- Enter a detailed description of the GL account
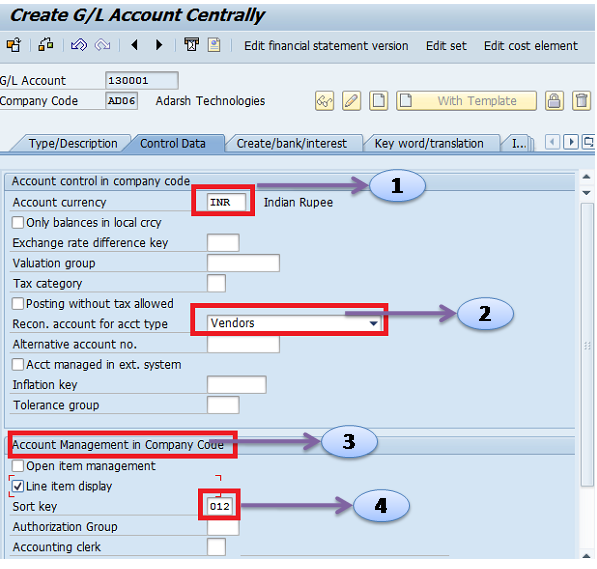
Step 4:- Click on Control data and update the following data.
1. Account Currency: – Update Account currency of GL Account
2. Reconciliation Account for account type: Select reconciliation account type ( we are creating GL Account for Sundry Creditors, so we selected vendors )
3.Account Management in company code: Select Appropriate Account Management i.e., open item management or Line item display
4. Sort Key: Update sort key
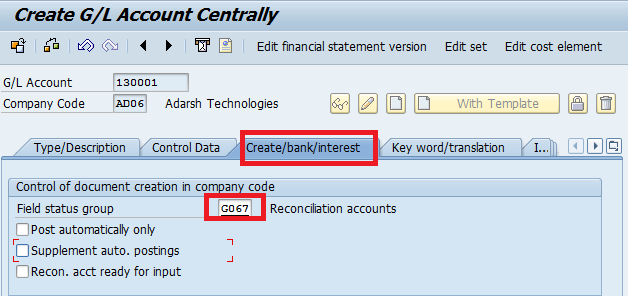
Step 5:- Click on Create/ Bank /Interest and enter the following data
Enter the Reconciliation accounts field status group and enter
Step 6:– Click on the Save icon to save the configured GL Account
Sundry Creditors GL Account is successfully created in SAP.
Define tolerance group for vendors /Customers
Importance of tolerance group: – The tolerance group is very important to define in the SAP system to facilitate dealing with the differences in payment
SAP R/3 IMG Menu Path : – IMG > Financial accounting > Accounts receivable and accounts payable > Business transactions > Outgoing payments > Manual outgoing payments > Define Tolerances (Vendors)
IMG > Financial accounting > Accounts receivable and accounts payable > Business transactions > incoming payments > Manual incoming payments > Define Tolerances (Customer)
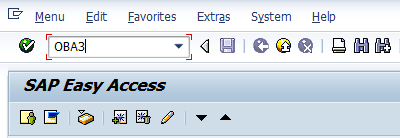
Transaction Code : – OBA3
Enter transaction code OBA3 in the SAP command field and press enter
Click on “New Entries” to define the tolerance groups for customers and vendors.
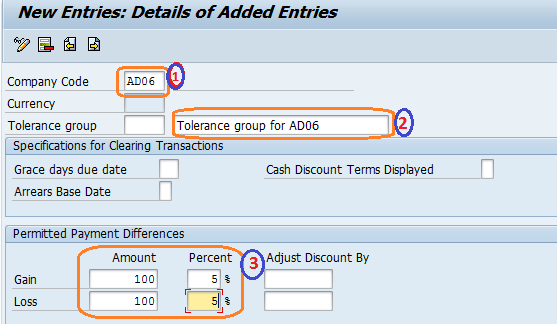
Update following data
- Company code: – Enter your company code
- Tolerance group: – Keep blank tolerance group field and update the description of tolerance
- Permitted Payment differences: – Enter amount and percent for gain and loss i.e 100 INR or 5% whichever is lower.
Click on the save icon to save the configured data. You have successfully maintained a tolerance group for vendors and customers.


